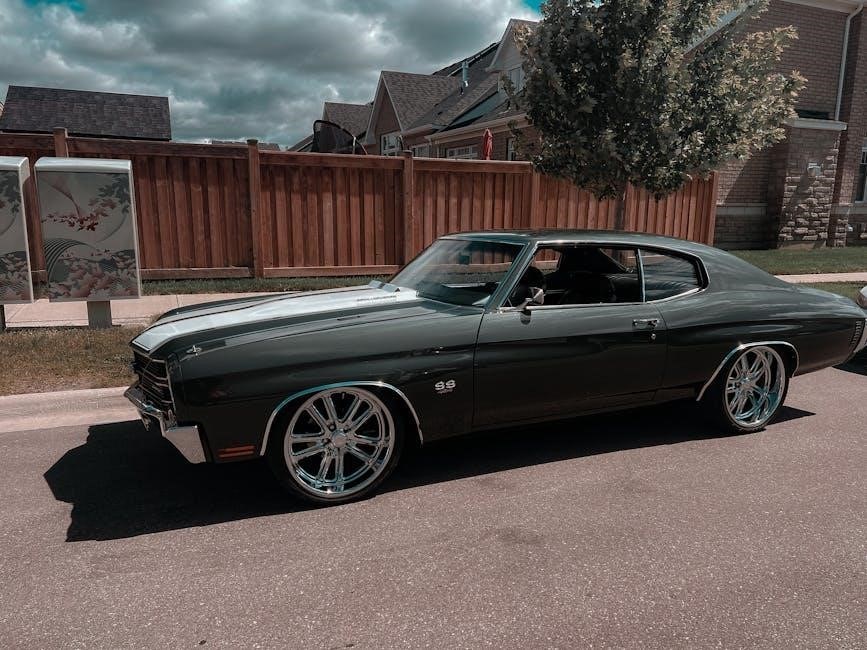
The 1966 Chevrolet Chevelle SS AMT model is a detailed 1:25 scale replica, offering a nostalgic build experience with chrome parts, rubber tires, and decals for authenticity.
1.1 Overview of the AMT Model Kit
The AMT 1966 Chevrolet Chevelle SS model kit is a 1:25 scale assembly set designed for enthusiasts and modelers. It includes detailed parts such as chrome components, clear pieces for headlights, and rubber tires for realism. The kit also features a water-slide decal sheet for accurate markings and a comprehensive instruction manual in PDF format. Molded in white, the model requires intermediate skill level 2, making it suitable for experienced hobbyists. The kit allows builders to recreate the iconic Chevelle SS with precision, capturing its classic styling and performance heritage. Assembly requires basic tools and patience for a professional finish.
1.2 Historical Significance of the 1966 Chevrolet Chevelle SS
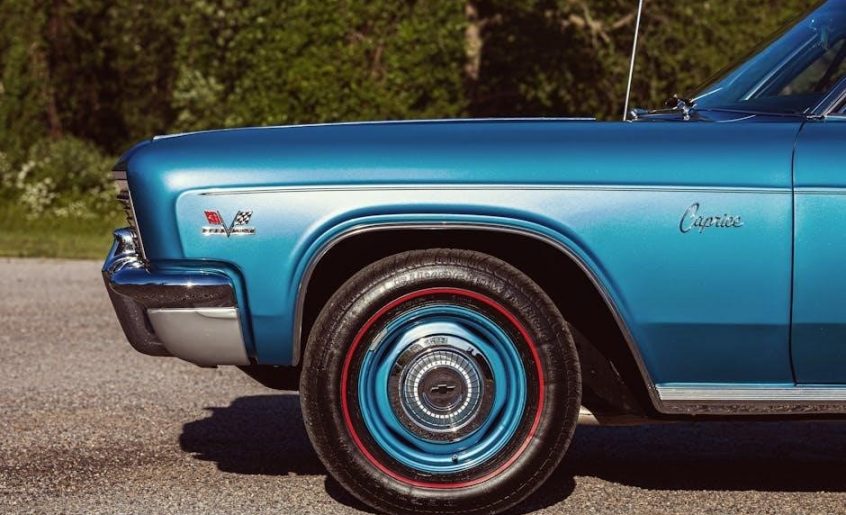
The 1966 Chevrolet Chevelle SS holds a prominent place in automotive history as a symbol of American muscle. Introduced in 1964, the Chevelle quickly gained fame for its powerful performance and sleek design. The 1966 model, with its bold styling and SS package, became a favorite among car enthusiasts, embodying the era’s focus on speed and style. Its popularity endures, making it a sought-after subject for scale models like the AMT kit, which allows builders to celebrate this iconic vehicle’s legacy and craftsmanship in miniature form.
1.3 Purpose of the Instructional Guide
This guide provides a comprehensive step-by-step approach to assembling the 1966 Chevrolet Chevelle SS AMT model. It aims to assist modelers of all skill levels, from novices to experienced builders, in achieving an accurate and professional finish. The guide covers unboxing, inventory, and assembly, offering detailed instructions, troubleshooting tips, and expert advice. By following the outlined process, enthusiasts can bring this iconic car to life in miniature form, ensuring a rewarding and enjoyable modeling experience that honors the Chevelle’s legacy and cultural significance.

Understanding the AMT Model Kit Components
The AMT model kit includes detailed parts like chrome components, rubber tires, and decals, ensuring an authentic representation of the 1966 Chevrolet Chevelle SS.
2.1 Unboxing and Inventory of Parts
Begin by carefully unboxing the AMT model kit, ensuring all components are accounted for. The package includes a chassis, engine, body panels, interior pieces, wheels, and decals. Check for any missing or damaged parts against the inventory list provided in the instructions. Organizing the parts by category will streamline the assembly process. Pay attention to small details like chrome accents and rubber tires, which add realism to the finished model. Properly sorting and preparing these components is essential for a smooth and enjoyable building experience.
2.2 Identifying Key Features and Details
The 1966 Chevrolet Chevelle SS AMT model kit includes detailed components such as a chromed engine, realistic chassis, and accurately molded body panels. Key features include opening doors, a detailed interior with a dashboard, and authentic wheel designs. The kit also provides chrome accents, clear plastic parts for windows, and a decal sheet for stripes and emblems. These elements replicate the iconic styling of the 1966 Chevelle SS, ensuring a faithful representation of the classic muscle car. Identifying these details early helps in planning the assembly and achieving an accurate, high-quality finish.
2;3 Tools and Materials Required for Assembly
To assemble the 1966 Chevrolet Chevelle SS AMT model, you’ll need basic hobby tools such as a hobby knife, sandpaper, clippers, and a file. A plastic cement glue and a brush for applying adhesive are essential. Paint and additional detailing tools, like fine-tip brushes, can enhance the model’s finish. A clean workspace with proper lighting is recommended. Water-slide decals require a bowl of warm water and a setting solution for precise application. Optional materials include reference images or additional paints for customization. Ensure all tools are within reach to streamline the assembly process and achieve professional results.
Downloading and Accessing the PDF Instructions
The official AMT instruction manual for the 1966 Chevrolet Chevelle SS is available as a free PDF download from the AMT website or authorized third-party sources.
3.1 Sources for the Official AMT Instruction Manual
The official AMT instruction manual for the 1966 Chevrolet Chevelle SS can be downloaded directly from the AMT website or reputable third-party hobby forums. These PDFs are free and include detailed assembly steps, diagrams, and parts lists. Ensure authenticity by verifying the source, as unauthorized versions may lack critical information. The manual covers all aspects of the build, from unboxing to final assembly, making it an essential resource for both novice and experienced modelers. Always cross-check downloaded files with the manufacturer’s official guidelines for accuracy.
3.2 Navigating the PDF Document Structure
The PDF instructions for the 1966 Chevrolet Chevelle SS AMT model are organized into clear sections, starting with a table of contents for easy navigation. The document begins with a list of required tools and materials, followed by detailed step-by-step assembly instructions. Each phase, from chassis assembly to final detailing, is accompanied by high-resolution diagrams and part references. A dedicated section for troubleshooting common issues ensures quick problem-solving. The PDF also includes a comprehensive index of parts and materials, making it easier to locate specific components during assembly. This structure ensures a smooth and efficient building process for modelers of all skill levels.
3.4 Troubleshooting Common Issues with the PDF
Common issues with the 1966 Chevrolet Chevelle SS AMT model PDF instructions may include missing pages, blurry diagrams, or compatibility problems with certain devices. Ensure your PDF reader is updated and compatible with the file format. If text or images appear distorted, check your zoom settings or rotate the view. For missing pages, re-download the PDF or verify its source. Contact AMT customer support for further assistance or replacement. Regularly update your software to avoid technical glitches and ensure a seamless assembly experience.

Step-by-Step Assembly Guide
Follow detailed instructions for assembling the 1966 Chevrolet Chevelle SS AMT model, starting with the chassis and engine, then the body, interior, wheels, and final touches.
4.1 Preparing the Workspace and Tools
Begin by organizing your workspace with a clean, flat surface and proper lighting. Gather essential tools like screwdrivers, sandpaper, clippers, and plastic glue. Use a parts tray to sort components, ensuring nothing gets lost. Optional tools like paint, brushes, and an airbrush can enhance detailing. Keep the instruction manual within reach for reference. Maintain a well-ventilated area if painting; A magnifying glass or lamp can aid in intricate tasks. Familiarize yourself with the kit’s contents before starting assembly. Comfort and efficiency are key to enjoying the build process. Always refer to the PDF instructions for specific tool recommendations. Stay organized for a smooth experience.
4.2 Assembling the Chassis and Engine
Start by attaching the engine block to the chassis using a screwdriver, ensuring proper alignment as per the PDF instructions. Sand any rough edges on parts for a smooth fit. Follow the recommended assembly sequence, typically starting with the engine and then adding suspension components. Use plastic glue sparingly to secure parts without creating a mess. Double-check each step to avoid misalignment. Dry-fit parts before gluing to ensure accuracy. Refer to diagrams or videos, like Roy Marko’s unboxing, for visual guidance. Work patiently and methodically to achieve a precise build. If issues arise, consult additional resources or the manual for clarification. Proper assembly of the chassis and engine is crucial for the model’s structural integrity and overall appearance. Once complete, the chassis and engine will form a solid foundation for the rest of the model. Stay organized and take your time to ensure a professional finish.
4.3 Building the Body and Exterior Components
Begin by aligning the body panels and ensuring a precise fit. Lightly sand edges to remove burrs and promote smooth assembly. Attach the chrome trim and exterior details using glue or screws as specified in the PDF instructions. Install the windshield and side windows, ensuring they fit flush without gaps. Paint and detail the body before assembling to maintain a professional appearance. Apply decals carefully, following the provided diagram for accurate placement. Pay attention to exterior features like bumpers and door handles, ensuring proper alignment; If parts feel loose, gently sand or adjust for a snug fit. Refer to resources like Roy Marko’s unboxing video for additional guidance. Patience and attention to detail are key for a polished finish.
4.4 Installing the Interior and Dashboard
Begin by assembling the interior components, starting with the seats and floor pan. Paint and detail the dashboard, ensuring accuracy to the 1966 Chevelle SS design. Install the steering wheel and instrument cluster, aligning them precisely. Attach the door panels and interior trim, securing them with glue. Reference the PDF instructions for correct part placement. Pay attention to small details like the gearshift and pedals. Use the provided decals for realistic gauges and controls. Avoid over-tightening parts to prevent breakage. Allow glue to dry completely before handling. Follow the guide to ensure a seamless fit and professional finish.
4.5 Attaching Wheels and Suspension
Start by assembling the suspension components, ensuring proper alignment with the chassis. Follow the PDF guide to attach the axles and suspension arms securely. Next, prepare the wheels by removing any mold lines and lightly sanding the rims. Test-fit the wheels to the axles for correct alignment. Apply a small amount of glue to the axle hubs and carefully press the wheels into place. Ensure the model sits level and evenly. Refer to the instructions for precise wheel placement and alignment. Allow the glue to set before handling the model. This step ensures a realistic stance and proper functionality of the suspension system.
4.6 Final Assembly and Quality Check
After completing all major components, carefully align and attach the body to the chassis, ensuring proper fitment. Refer to the PDF instructions for precise alignment. Inspect all moving parts, such as doors and hood, to ensure smooth operation. Double-check that all small details, like decals and chrome accents, are correctly applied. Perform a thorough visual inspection for any gaps, misalignments, or imperfections. Make final adjustments as needed, using sanding or touch-up paint. Test the suspension and wheels for proper functionality. Once satisfied, allow all glued parts to fully set before handling the model extensively. This ensures a durable and professional finish.
Tips for Achieving a Professional Finish
Use thin paint coats, allow proper drying, and apply decals smoothly. Avoid over-sanding and ensure precise alignment of small parts. Regularly clean tools and workspace.
5.1 Painting and Detailing Techniques
Achieving a professional finish requires precise painting and detailing. Use thin coats of paint, allowing each layer to dry completely before applying the next. Employ a fine brush for intricate details like emblems or trim. Decals should be applied with water, smoothed gently to avoid air bubbles. For chrome parts, consider using a metallic paint or chrome spray for authenticity. Minor imperfections can be touched up with a small brush. Reference images of the real 1966 Chevelle SS to ensure accuracy. Clean tools regularly to prevent paint contamination and maintain a polished look.
5.2 Applying Decals and Stickers Correctly
Applying decals requires precision and patience. Start by soaking the decal in warm water until it loosens from the backing paper. Gently slide it onto the model using a brush or cotton swab, ensuring proper alignment. Use a small amount of water or a specialized solution to position it without air bubbles. If bubbles appear, use a needle to carefully prick and smooth them out. Allow the decal to dry completely before handling. For a professional finish, apply a clear coat to protect the decal and blend it with the surrounding paint. Practice and patience are essential for achieving a flawless look.
5.3 Avoiding Common Mistakes During Assembly
Common mistakes during assembly include misaligning parts and improper fitting. Always refer to the instructions to ensure correct placement and alignment. Avoid forcing parts together, as this can cause breakage. If a part doesn’t fit, gently sand or trim it rather than applying excessive force. Use clippers carefully to avoid leaving rough edges. Work in a clean, well-lit workspace to minimize errors. Double-check each step before moving on to maintain accuracy. By following these tips, you can achieve a smooth and precise assembly process, ensuring your model looks its best.

Customization and Advanced Modifications
Customize your 1966 Chevelle SS AMT model with aftermarket parts, unique paint schemes, or weathering effects for a personalized touch. Experiment with advanced techniques to enhance realism and detail.
6.1 Upgrading with Aftermarket Parts
Enhance your 1966 Chevelle SS AMT model by incorporating aftermarket parts such as custom wheels, engine details, or interior upgrades. These additions can elevate the model’s realism and personalization. Ensure compatibility with the AMT kit to maintain seamless integration. Research online for recommended aftermarket components that align with your vision. Proper installation requires patience and precision to avoid compromising the kit’s original structure. Upgrading with aftermarket parts allows you to create a unique version that stands out, reflecting your personal style and modeling expertise.
6.2 Personalizing the Model with Unique Features
Personalizing your 1966 Chevelle SS AMT model allows you to infuse a unique flair, making it a one-of-a-kind creation. Consider adding custom paint schemes, rare decals, or modifying the interior to reflect a specific era or style. Enthusiasts often add weathering effects or aftermarket accessories like chrome rims for a personalized touch. You can also experiment with interior details, such as custom upholstery or dashboard modifications, to create a model that stands out. Personalization lets you express your creativity and showcase your vision, transforming the AMT kit into a truly bespoke piece.
6.3 Adding Weathering Effects for Realism
Adding weathering effects to your 1966 Chevelle SS AMT model enhances its realism and gives it a lived-in appearance. Techniques like washes, pigments, and streaking can simulate dust, dirt, and rust. Use a light touch to avoid overweathering, starting with subtle effects like fading paint or chrome oxidation. Apply rust to areas prone to corrosion, such as wheel wells or exhaust tips. Streaking can mimic water runoff or oil stains. For added depth, use reference images to ensure accuracy. Weathering transforms your model into a convincing replica of a vintage vehicle, showcasing its age and character authentically.
Troubleshooting Common Assembly Issues
Common issues include misaligned parts and gaps. Use sandpaper to smooth edges and ensure proper alignment. Consult the PDF manual for clarification and solutions to fit problems.
7.1 Fixing Misaligned Parts and Gaps
Misaligned parts and gaps are common issues during assembly. To fix these, gently sand the edges of the parts using fine-grit sandpaper to ensure a smooth fit. If the parts still don’t align properly, check the assembly steps in the PDF instructions for accuracy. Applying a small amount of plastic cement carefully can help close minor gaps. For larger misalignments, consider trimming the parts slightly with a hobby knife. Regularly referring back to the manual ensures proper alignment and minimizes the need for adjustments.
7.2 Correcting Paint and Decal Errors
Paint and decal errors can detract from the model’s finish. To correct paint mistakes, lightly sand the area and repaint using the same color. For decal errors, soak the decal in warm water, carefully peel it off, and replace it with a spare. Ensure decals are applied on a smooth, dry surface using a soft brush to prevent air bubbles. The PDF instructions often include tips for touch-ups and decal placement. Proper preparation and patience are key to achieving a professional-looking finish on your 1966 Chevrolet Chevelle SS model.
7.3 Solving Problems with Fit and Tolerance
Fitting issues with the 1966 Chevrolet Chevelle SS AMT model can arise due to part misalignment or tight tolerances. To address this, gently sand the affected areas using fine-grit sandpaper to trim excess plastic. Apply heat with a hairdryer to slightly soften parts for better alignment. Use plastic cement sparingly to secure pieces without creating gaps. If a part is too tight, carefully file it down. Patience and precision are key to ensuring a seamless fit. The PDF instructions often provide guidance on handling such issues, ensuring your model assembly proceeds smoothly.

Displaying and Maintaining Your Finished Model
Properly display your 1966 Chevrolet Chevelle SS AMT model in a glass case to protect it from dust. Regularly clean with a soft cloth and avoid direct sunlight for preserving the finish. Store the model in a cool, dry place to maintain its condition. Ensure long-term preservation by handling it gently and keeping it away from moisture. These steps will help maintain the model’s pristine appearance and ensure it remains a cherished display piece for years.
8.1 Choosing the Right Display Case
Selecting the right display case ensures your 1966 Chevrolet Chevelle SS AMT model remains protected and visually appealing. Opt for a high-quality glass case with UV protection to prevent fading. The case should be slightly larger than the model to accommodate proper spacing. A sturdy, scratch-resistant base is essential for stability. Consider a case with a removable top or front-opening design for easy access. Ensure the case is specifically designed for models of similar size to maintain proportions. Proper ventilation and a dust-proof seal are also important to preserve the model’s condition over time.
8.2 Cleaning and Protecting the Model
Regular cleaning and protection are essential to maintain your 1966 Chevrolet Chevelle SS AMT model’s appearance. Use a soft, lint-free cloth to gently wipe away dust and debris. Avoid harsh chemicals or abrasive materials that could damage the paint or decals. For stubborn stains, a mild soap solution can be applied, but ensure it is fully rinsed and dried. Consider applying a clear protective spray to shield the model from dust and UV light. Regular maintenance ensures the model remains pristine and preserves its value for years to come. Always handle the model with clean, dry hands to prevent oil residue buildup.
8.3 Storing the Model for Long-Term Preservation
For long-term preservation, store the 1966 Chevrolet Chevelle SS AMT model in a protective display case or airtight container. Keep it in a cool, dry environment away from direct sunlight to prevent fading or warping. Avoid extreme temperatures and humidity, as these can damage paint and plastics. Clean the model thoroughly before storage to prevent dust buildup. Use soft padding or foam inserts to prevent movement and scratches. Handle the model minimally and with clean hands to avoid oil residue. Store the model upright to maintain balance and prevent stress on any components. This ensures your model remains pristine for years.
Building the 1966 Chevrolet Chevelle SS AMT model is a rewarding experience, blending nostalgia with precision. This project offers a deeper appreciation for classic automotive design and modeling craftsmanship, inspiring enthusiasts to explore further creative ventures.
9.1 Summary of the Assembly Process
The assembly of the 1966 Chevrolet Chevelle SS AMT model begins with unboxing and inventorying parts, followed by chassis and engine construction. The body and exterior components are then carefully assembled, with attention to detail in painting and decal application. Installing the interior, dashboard, and suspension ensures a realistic finish. Final assembly involves attaching wheels and performing a quality check. Patience and adherence to the provided PDF instructions are key to achieving a professional result. Proper tools and workspace preparation are essential for a smooth and enjoyable building experience.
9.2 Encouragement for Further Modeling Projects
Completing the 1966 Chevrolet Chevelle SS AMT model is a rewarding experience that builds confidence and skill. Modelers are encouraged to explore other AMT kits, such as the 1970 Chevelle SS 454 or the 1964 Corvette Sting Ray, to expand their portfolios. The success of this project serves as a foundation for tackling more complex models, experimenting with customizations, and refining techniques. Joining online communities and forums can provide inspiration and support for future endeavors, fostering a lifelong passion for scale modeling and creativity.
9.3 Final Tips for Modelers
Always follow the instructions carefully and take your time during assembly to ensure accuracy. For a professional finish, use high-quality paints and apply decals with precision. Regularly clean your workspace to avoid losing small parts. Practice patience, especially with intricate details like chrome trim and weathering effects. Store your finished model in a protective case to preserve its condition; Experimenting with customizations, such as aftermarket parts, can add a personal touch. Join online forums for tips and inspiration to enhance your modeling skills and explore new projects with confidence.

Additional Resources and Support
Visit official AMT websites and forums for detailed guides, troubleshooting tips, and community advice to enhance your modeling experience with the 1966 Chevelle SS kit.
10.1 Official AMT Customer Support
AMT offers dedicated customer support through their official website, providing access to PDF instructions, troubleshooting guides, and direct assistance for modelers facing challenges with the 1966 Chevelle SS kit.
10;2 Online Communities and Forums
Online communities and forums are invaluable resources for modelers seeking support and sharing experiences with the 1966 Chevrolet Chevelle SS AMT model. Platforms like Reddit, Facebook groups, and specialized modeling forums host discussions, tips, and solutions for common issues. Many users share their builds, troubleshooting strategies, and creative modifications. These communities are excellent for connecting with fellow enthusiasts, gaining inspiration, and resolving challenges. Active participation can enhance your modeling journey and provide access to a wealth of knowledge tailored to the AMT Chevelle SS kit.
10.3 Recommended Tutorials and Videos
For visual learners, recommended tutorials and videos provide step-by-step guidance for assembling the 1966 Chevrolet Chevelle SS AMT model. YouTube channels, modeling websites, and forums often feature detailed build tutorials, painting techniques, and customization ideas. These resources are particularly helpful for addressing specific challenges, such as aligning parts or applying decals. Many tutorials are created by experienced modelers who share tips for achieving a professional finish. Watching these can help you avoid common mistakes and enhance your modeling skills, ensuring your Chevelle SS model turns out impressive and accurate.